


Creating Desktop Apps using HTML/CSS/JS + Node.js with NW.js
SEP 20, 2015
What is NW.js?
Maybe you've already heard about node-webkit. It was renamed to NW.js, but keeps the same objective: bring your web development tools and skills to build multi-platform desktop apps.
NW.js is an app runtime for writing native apps that uses Chromium to render your interface and allows you to run your Node.js modules desktop-side.
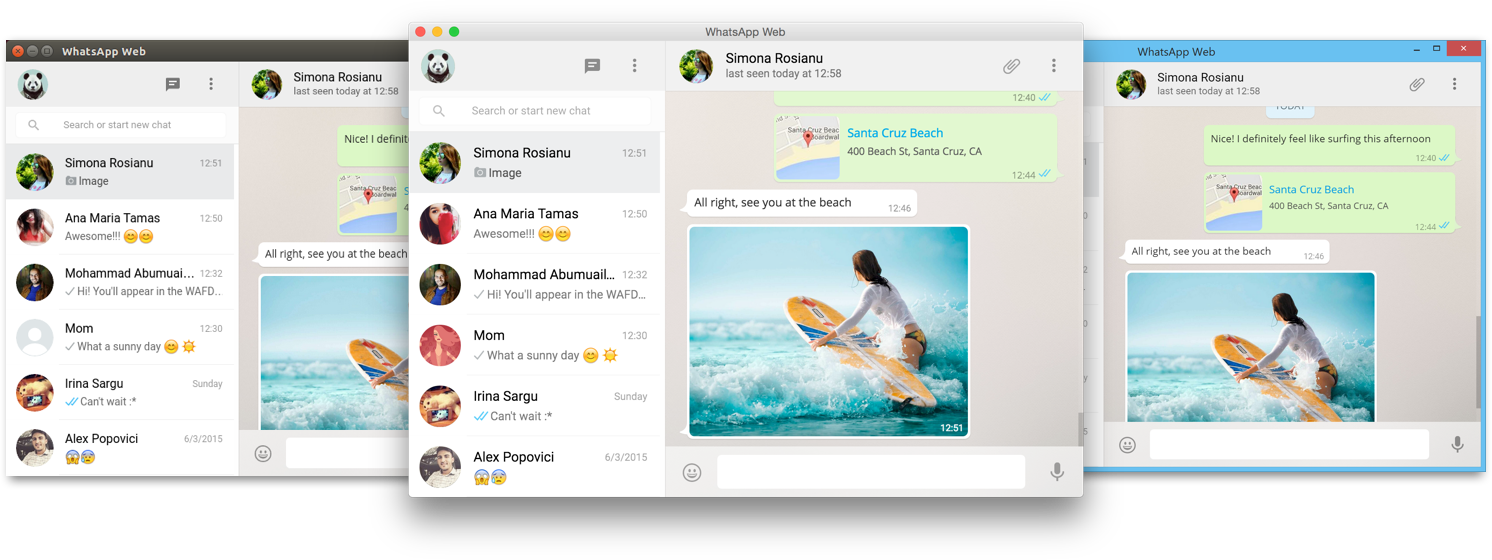
There are many nice apps using it as you can see in this link. For example, this nice unofficial WhatsApp app for desktop:
UPDATE: Jul 31, 2016
I haven't tried Electron yet, but some friends (and many people out there) prefer Electron than NW.js. I suggest you to read the pros and cons of each one before deciding to use NW.js and to read this long tutorial.
Setting it up
The first step is to download the executable built for your operating system from the project page.
When running NW.js, it will search for a package.json file to know what should be loaded and some extra configuration, like the default window size.
For a simple test, create the package.json file with the following content:
{
  "name": "nw-hello-world",
  "version": "1.0.0",
  "main": "index.html"
}
And the index.html with the following:
<!DOCTYPE html>
<html>
  <head>
    <title>Hello World!</title>
  </head>
  <body>
    <h1>Hello World!</h1>
  </body>
</html>
After unpacking the NW.js file that you've just downloaded, you'll run your application calling the NW.js program and passing as an argument the path to your project.
On Windows:
> C:\path\to\nwjs\nw.exe C:\path\to\your\project
On Linux:
> /path/to/nwjs /path/to/your/project
On OSX, the executable binary is in a hidden directory within the .app file. You can call it as:
> /path/to/nwjs/Contents/MacOS/nwjs /path/to/your/project
or
> open -n -a nwjs --args "/path/to/your/project"
A better way to run is adding the NW command to PATH (Windows) or bash shell (OSX).
Developing Apps
Window Properties
If you run this hello world demo, you'll get the following:
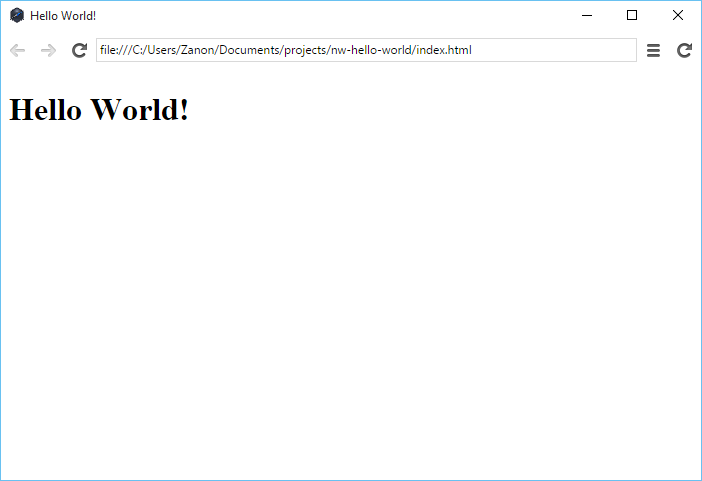
By default, for debugging purposes, NW.js shows the address bar, the developer tools button, navigation arrows and two (?!) refresh buttons. For production code, this toolbar can be easily hidden setting the window.toolbar property to false in the package.json file.
{
  "name": "nw-hello-world",
  "version": "1.0.0",
  "main": "index.html",
  "window": {
    "toolbar": false
  }
}
Another main configuration for deployment is to link your application icon. This is done setting the path in the window.icon property. With the window property, you can also set a default window size for your app and max-min ranges.
{
  "name": "nw-hello-world",
  "version": "1.0.0",
  "main": "index.html",
  "window": {
    "toolbar": false,
    "icon": "my-app-icon.png",
    "fullscreen": false,
    "resizable" : true,
    "width": 800,
    "height": 600,
    "min_width": 400,
    "min_height": 300
  }
}
You can take a look in this link for a full list of configuration properties.
Using Node Modules
Using node modules is pretty straightforward. For example, if you want to use Node module request, you need to download the module and save its path to your package.json file. It can be done automatically with the NPM command:
npm install request --save
Next, reference you JavaScript file inside your index.html:
<script src="app.js"></script>
In the example below, I'm also using jQuery to handle the UI. However, for a larger application, mixing UI and app's logic in the same file is very hard to maintain. You'll likely need a JavaScript framework, like Angular or Ember, to have a better separation of concerns. If the jQuery lib is in a subdirectory, you can reference it using:
<script src="./js/jquery.min.js"></script>
For a demo, you can test with the following app.js file:
var request = require('request').defaults({ encoding: null });
request.get('http://nwjs.io/images/nw.png', function (err, response, body) {
  if (err || response.statusCode != 200)
    throw 'Error retrieving image';
  var base64Image = "data:image/png;base64," + new Buffer(body).toString('base64');
  // using jQuery to write the response to the UI
  $('#img').append('<img src=\"' + base64Image + '\" />');
});
index.html
<!DOCTYPE html>
<html>
  <head>
    <title>Hello World!</title>
  </head>
  <body>
    <h1>Hello World!</h1>
    <div id="img"></div>
    <script src="./js/jquery.min.js"></script>
    <script src="app.js"></script>
  </body>
</html>
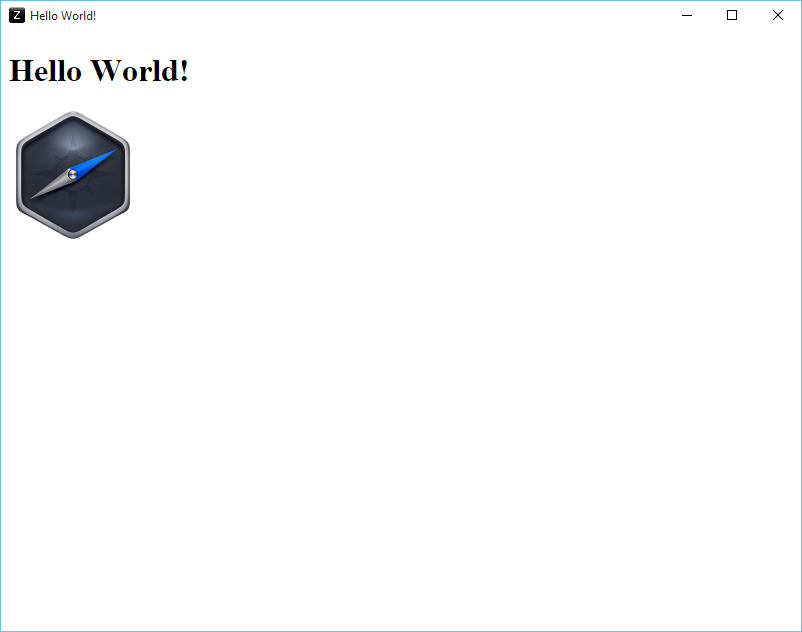
With this demo, you'll get the following result:
Native Features
To make the app a truly desktop app, some features are necessary like a menu bar and a tray icon.
The code for a tray icon is the same for all platforms. However, the menu bar may have a different behavior between platforms. That's because Windows and Linux allows one menu bar for each window that your app opens and OSX just allows one menu bar per application. So, best practice here is to set a menu bar only for your main window.
Menu Bar
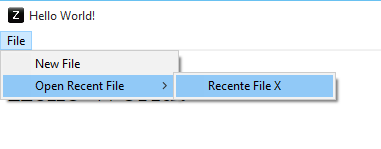
To get this result, just edit your app.js file to the following:
var menubar = new nw.Menu({
  type: 'menubar'
});
var fileMenu = new nw.Menu();
fileMenu.append(new nw.MenuItem({
  label: 'New File',
  click: function() {
    alert('Clicked to create a new file');
  }
}));
var openRecentMenu = new nw.Menu();
openRecentMenu.append(new nw.MenuItem({
  label: 'Recente File X',
  click: function() {
    alert('Clicked to open a recent file');
  }
}));
menubar.append(new nw.MenuItem({ label: 'File', submenu: fileMenu}));
fileMenu.append(new nw.MenuItem({ label: 'Open Recent File', submenu: openRecentMenu}));
var win = nw.Window.get();
win.menu = menubar;
Tray Icons
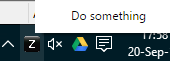
This simple tray was created with the following code:
var tray = new nw.Tray({
  icon : 'my-app-icon.png',
  title: 'My App Tray'
});
var menu = new nw.Menu();
menu.append(new nw.MenuItem({
  label: 'Do something'
}));
tray.menu = menu;
Distributing
You need to package your source code with the NW.js binaries. For a easy way to do this, try the NPM module nw-builder.
Installation: (prefer a global install with the -g argument)
> npm install nw-builder -g
Usage: create a deploy.js file with the following content
var NwBuilder = require('nw-builder');
var nw = new NwBuilder({
  files: ['./**'], // simple-glob format
  platforms: ['osx32', 'osx64', 'win32', 'win64', 'linux32', 'linux64']
});
nw.build().then(function () {
  console.log('all done!');
}).catch(function (error) {
  console.error(error);
});
Deploying:
> node deploy.js
Now is the time to be shocked: wow! 60 MB for a hello world app! So, that's a downside of using NW.js. It requires the user to download at least 60 MB for the webkit browser and Node.js dependencies.
Source Code Security
Since you are distributing your app with all of your source code minified, it's possible to find it and clone the app. If you want protection, you need to compile it to native code using V8 snapshots. Take a look in this link for a how-to. Just note that, currently, compiled code runs 30% slower than normal JS files.
Conclusion
So, that was the basic. If you are interested, you can continue following the NW.js wiki to learn many more important features. Or you can click in this link for nice sample apps or this link to get a boilerplate app.
Again, just to reinforce, the disadvantages is that your user need to download extra 60 MB to run your app and, if you need to protect your source code, your app will be 30% slower.
However, I do believe that NW.js has a potential and can be useful to create nice multi-platform apps if you, or your team, is already used to work with Node.js and Web Development.
UPDATE: Jul 31, 2016
I've updated this tutorial according to v0.16 (changes related with previous tutorial were related with how to get the Tray and Menu objects).